
Learn how to make the best crispy fried chicken—golden, crunchy, and juicy every time. Follow this step-by-step recipe with expert tips for perfect results
Crispy Fried Chicken Recipe Do you dream of fried chicken that’s crispy on the outside and juicy on the inside, without the grease? If you’ve ever struggled with soggy coatings, undercooked meat, or overly oily fried chicken, you’re not alone. Many home cooks face these challenges, but the good news is that achieving restaurant-quality fried chicken at home is entirely possible—and I’m here to show you how.
After two decades of perfecting recipes and techniques, I’ve developed a foolproof method that combines time-tested wisdom with modern culinary science. This comprehensive guide will walk you through every step, ensuring perfect results every time.Crispy Fried Chicken Recipe: The Secret to Perfectly Juicy and Crunchy Chicken Every Time
The Journey to Perfect Fried Chicken: A Personal Story
My quest for the perfect fried chicken recipe began in my grandmother’s kitchen. Like many Southern cooks, she had a magical touch with fried chicken—achieving that perfect golden crust and tender, flavorful meat that seemed impossible to replicate. After years of trial and error, countless testing sessions, and deep diving into the science of frying, I finally cracked the code.
What I discovered was surprising: the secret isn’t just in the ingredients or technique alone—it’s in understanding how they work together. The breakthrough came when I started treating fried chicken not just as a recipe, but as a science experiment with delicious results.https://tastenrecipes.com/easy-black-pepper-chicken/
The Science Behind Incredible Fried Chicken
Understanding the science behind frying chicken will transform your cooking. Here’s what makes this recipe work:
The Double-Dredge Method
The key to achieving that thick, crunchy crust lies in what I call the “double-dredge” method. By dipping the chicken in seasoned flour, then buttermilk, and finally back in flour, we create multiple layers that develop into a substantial, crispy coating. Each layer serves a specific purpose:
- First flour coating: Creates a base that helps the buttermilk adhere
- Buttermilk layer: Provides moisture and helps activate the proteins in the flour
- Final flour coating: Forms the ultimate crispy exterior
The Critical Rest Period
Perhaps the most overlooked step in fried chicken preparation is the resting period after coating. During this 30-minute rest:
- The flour begins to hydrate from the buttermilk
- Proteins in the coating start to relaxhttps://tastenrecipes.com/creamy-baked-mac-and-cheese/
- A paste-like layer forms that will become ultra-crispy when fried
This resting period is non-negotiable for achieving that perfect crust that stays crispy even hours after frying.
Temperature Control: The Golden Rule
Temperature management is crucial for perfect fried chicken. Here’s why:
- Too cold (below 325°F): The coating absorbs excess oil, becoming greasy
- Too hot (above 375°F): The outside burns before the inside cooks
- Perfect range (350°F): Achieves ideal crispiness while cooking the meat through
Essential Ingredients for Perfect Fried Chicken
The Chicken
- 4 pounds chicken pieces (mix of thighs, drumsticks, wings, and breasts)
- Choose air-chilled chicken when possible
- Room temperature before cooking
- The Secret to Perfectly Crispy Fried Chicken
- How to Achieve the Ultimate Crispy Fried Chicken
- Crispy Fried Chicken: The Best Technique for a Golden Crunch
- Top Tips for Achieving Crispy Fried Chicken Every Time
- The Secret to Extra Crispy Fried Chicken: Techniques You Need to Know
- How to Make Crispy Fried Chicken: The Ultimate Guide
The Marinade
- 2 cups buttermilk
- 2 tablespoons kosher salt
- 1 tablespoon black pepper
- 2 teaspoons garlic powder
- 2 teaspoons paprika
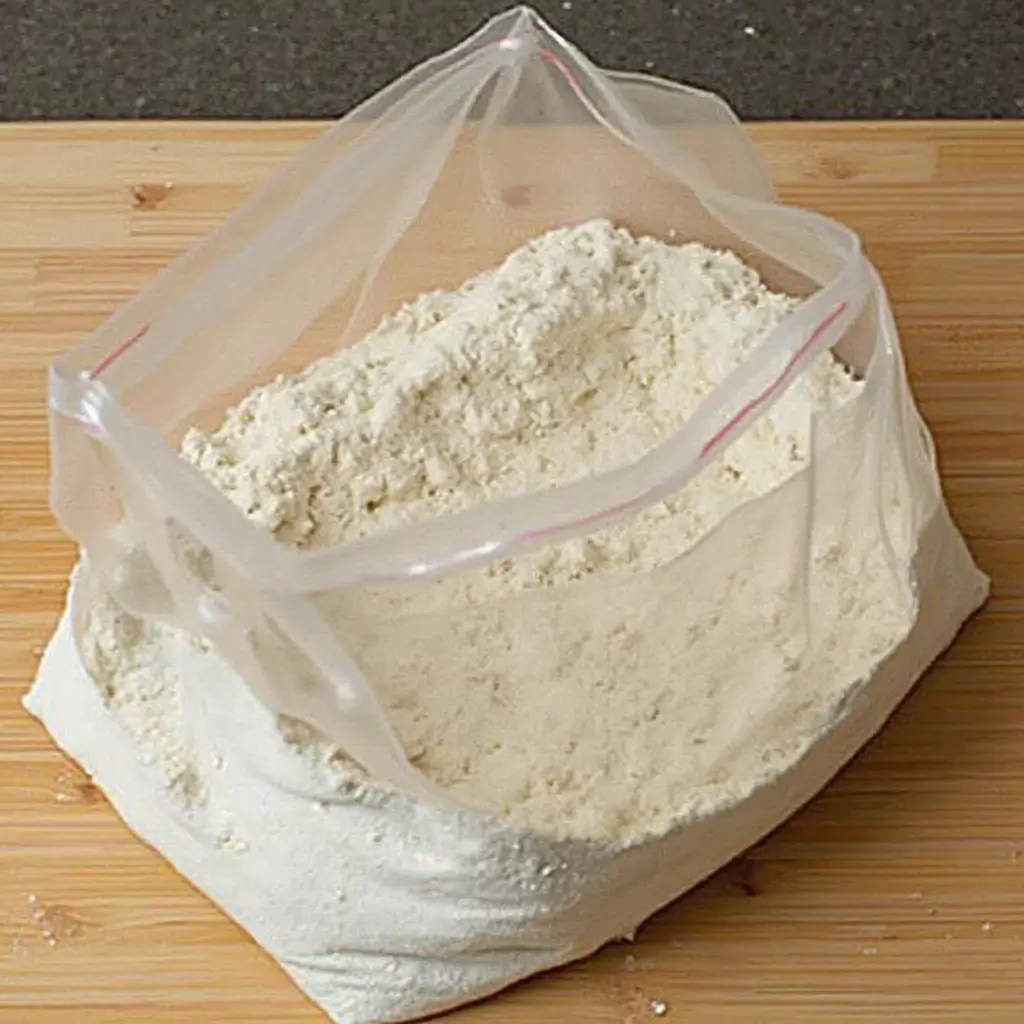
The Coating
- 3 cups all-purpose flour
- 1 tablespoon paprika
- 1 tablespoon garlic powder
- 1 tablespoon onion powder
- 2 teaspoons black pepper
- 2 teaspoons kosher salt
- 1 teaspoon cayenne pepper (optional)
The Frying Medium
- 4 cups vegetable oil or peanut oil
- Maintained at 350°F throughout cooking
Preparation Method: Step by Step
1. Marinate the Chicken (12-24 hours ahead)
- Combine buttermilk and marinade seasonings in a large bowl
- Submerge chicken pieces completely
- Cover and refrigerate for 12-24 hours
- Remove from refrigerator 30 minutes before cooking
2. Prepare the Coating
- Mix all dry ingredients thoroughly in a large bowl
- Transfer to a shallow dish for easier dredging
- Reserve 1 cup of seasoned flour for touch-ups
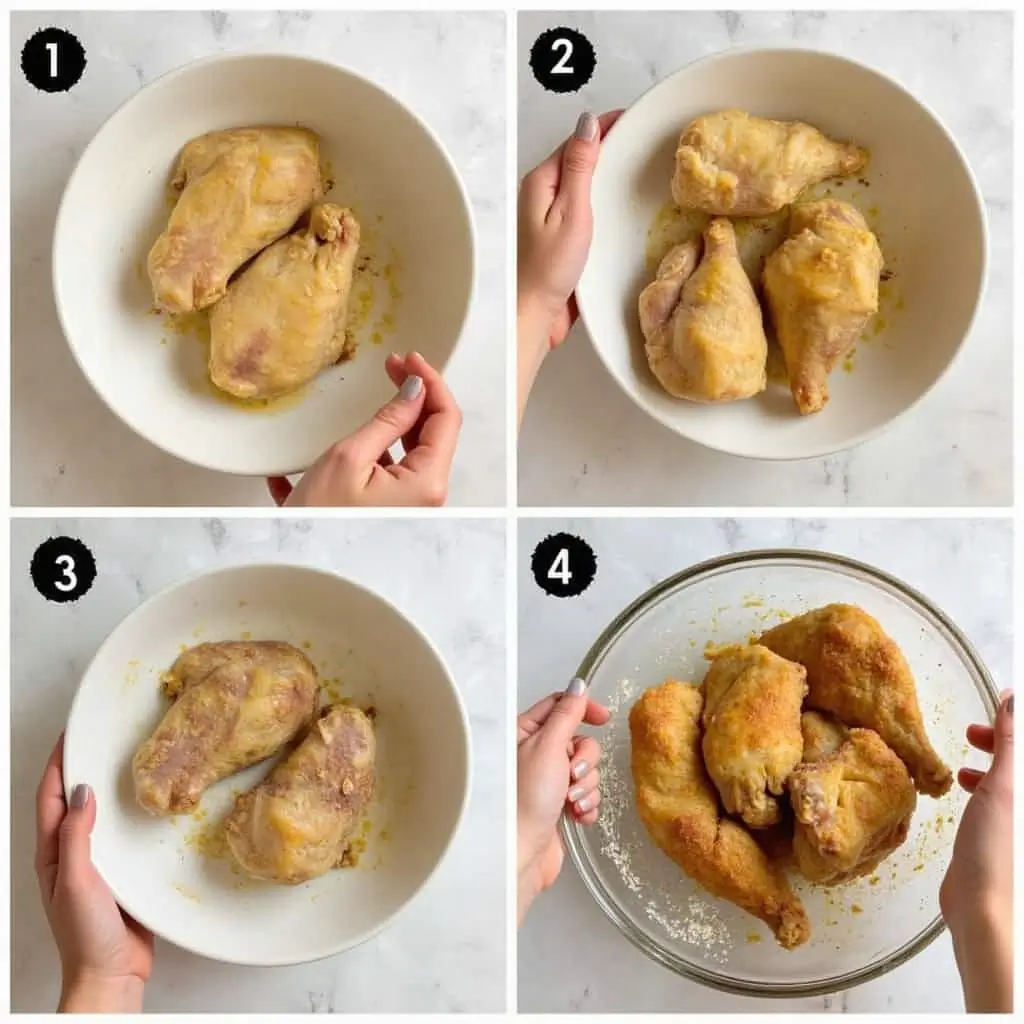
3. The Coating Process
- Remove chicken from buttermilk, letting excess drip off
- Dredge in seasoned flour mixture
- Dip in remaining buttermilk
- Final dredge in seasoned flour
- Place on a wire rack for resting
4. The Critical Rest
- Let coated chicken rest on wire rack for 30 minutes
- During this time, prepare your frying station
- Monitor room temperature (avoid excessive heat/humidity)
5. The Frying Process
- Heat oil to 350°F in a large cast-iron skillet or Dutch oven
- Add chicken pieces skin-side down
- Maintain oil temperature between 325-350°F
- Fry for 12-15 minutes per side
- Check internal temperature (165°F for white meat, 175°F for dark)
Troubleshooting Common Problems
Dark Coating but Undercooked Chicken
- Solution: Lower oil temperature to 325°F
- Cover pan partially during cooking
- Allow chicken to reach room temperature before frying
- Why Oil Temperature is Key to Crispy Fried Chicken
- Resting and Coating: The Steps for Extra Crispy Fried Chicken
- Cooking Tips for Crispy Fried Chicken Every Time
Coating Falls Off
- Cause: Insufficient rest time or wet spots in coating
- Solution: Ensure thorough dredging and minimum 30-minute rest
- Pat chicken dry before first flour coating
Greasy Results
- Cause: Oil temperature too low
- Solution: Maintain consistent 350°F
- Don’t overcrowd the pan
- Use a thermometer for accuracy
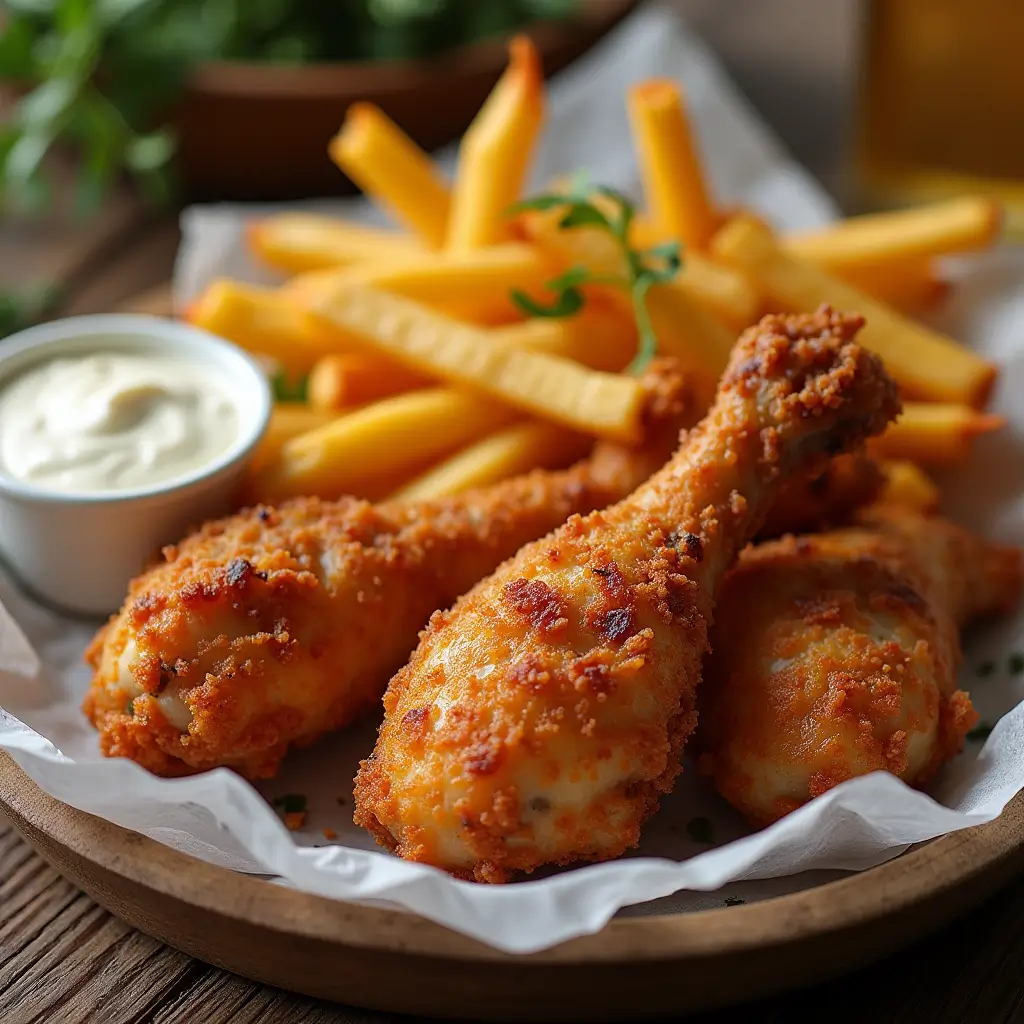
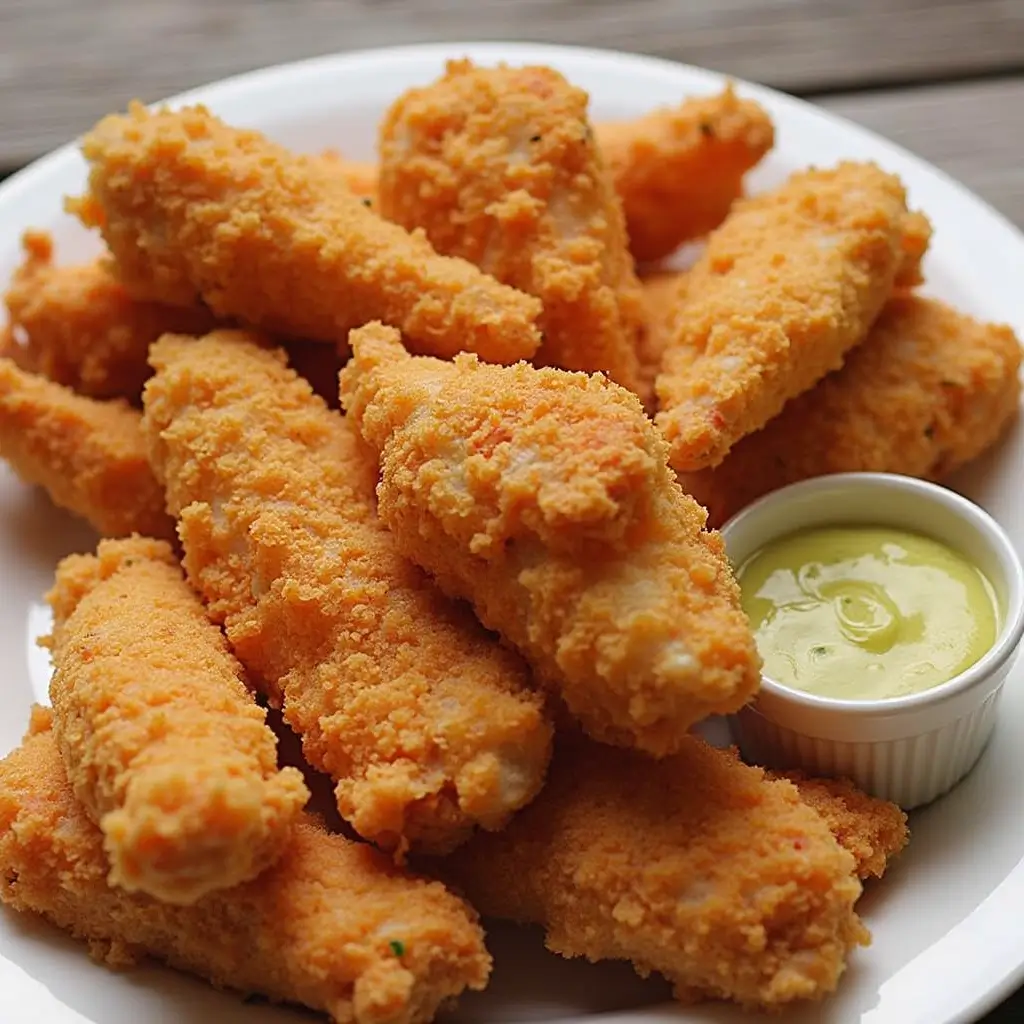
Serving and Storage Tips
Immediate Serving
- Drain on wire rack over paper towels
- Hold in warm oven (200°F) if cooking multiple batches
- Serve within 30 minutes for optimal crispiness
Storage and Reheating
- Cool completely before refrigerating
- Store in airtight container for up to 3 days
- Reheat in 375°F oven for 15-20 minutes
- Never microwave (destroys crust texture)
Crispy Fried Chicken Recipe: The Secret to Perfectly Juicy and Crunchy Chicken Every Time
Gluten-Free Version
- Replace all-purpose flour with cup-for-cup gluten-free blend
- Add 1 teaspoon xanthan gum if not included in blend
- Increase rest time to 45 minutes
Spicy Variations
- Nashville Hot: Add cayenne to hot oil baste
- Korean Style: Add gochugaru to coating
- Buffalo: Toss in buffalo sauce after frying
Healthier Options
- Remove skin before cooking
- Oven-fry at 425°F with oil spray
- Air fryer adaptation available
The Perfect Accompaniments
Traditional Sides
- Buttermilk biscuits
- Coleslaw
- Mashed potatoes
- Green beans
- Mac and cheese
Sauce Pairings
- Honey mustard
- Ranch dressing
- Hot sauce
- White gravy
- Sweet chili sauce
Expert Tips for Success
- Temperature Management
- Invest in a good thermometer
- Monitor oil temperature constantly
- Adjust heat as needed during cooking
- Coating Technique
- Use one hand for wet ingredients, one for dry
- Shake off excess at each step
- Perfecting the Crispy Coating: A Step-by-Step Guide to Fried Chicken
- Press coating gently into chicken
- Crispy Fried Chicken Recipe: The Secret to Perfectly Juicy and Crunchy Chicken Every Time
- Oil Selection
- Choose oils with high smoke points
- Peanut oil for traditional flavor
- Vegetable oil for neutrality
- Resting Your Chicken for Extra Crispiness
- Avoid olive oil (too low smoke point)
- Equipment Needs
- Heavy-bottomed pan or Dutch oven
- Thermometer
- Wire racks
- Paper towels
- Why Oil Temperature Matters for Crispy Fried Chicken
- Tongshttp://Check out this guide to choosing the best cooking oil for frying
Conclusion
Perfect fried chicken is achievable at home with the right technique, patience, and attention to detail. This recipe combines generations of wisdom with modern culinary science to produce consistently excellent results. Remember that practice makes perfect—don’t be discouraged if your first attempt isn’t restaurant-quality. Focus on temperature control, proper coating technique, and timing, and you’ll be making incredible fried chicken in no time.The Best Way to Reheat Fried Chicken Without Losing Crispinesshttps://tastenrecipes.com/creamy-baked-mac-and-cheese/
Whether you’re cooking for a family dinner or a special occasion, this method will help you achieve that coveted combination of crispy exterior and juicy interior that makes fried chicken so irresistible. Happy cooking!https://tastenrecipes.com/the-primary-keyword-venezuelan-tequenos-is-at-the-start-for-better-ranking/Crispy Fried Chicken Recipe: The Secret to Perfectly Juicy and Crunchy Chicken Every Time